I will share with you five simple tricks we use in our video production that practically anyone can implement to get the most out of their wireless lavalier microphone system Hollyland Lark 150. Let’s dive in.
If you don’t like reading long articles, I would recommend watching my YouTube video below about Hollyland Lark 150, where you can listen to the system’s actual quality compared to other brands like Tascam, Rode, Sennheiser:
If you read my previous articles, you know we like using Hollyland Products in our production, especially their wireless video system. I think they’re amazing.
Today I will write about real-life use case scenarios of Hollyland Lark 150, and also, I will give you some great tips that will help you to improve your production.
We also recommend reading our newest similar blog post “Lavalier vs. Boom Mic: Pros and Cons for Different Recording Situations”
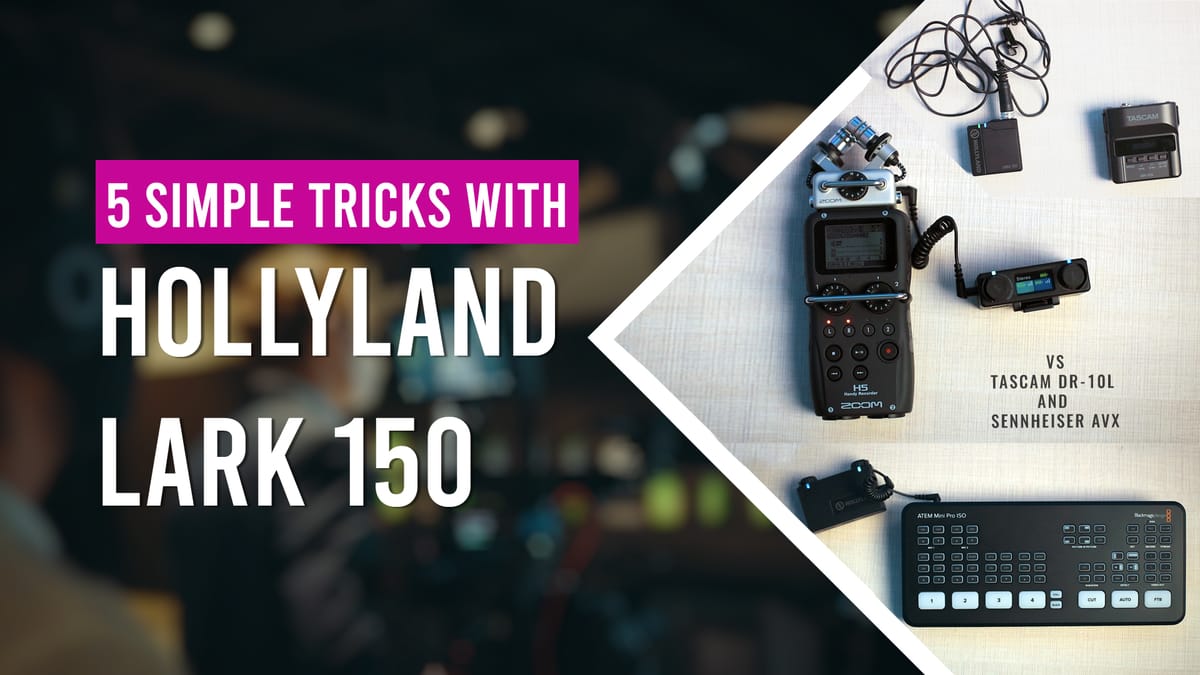
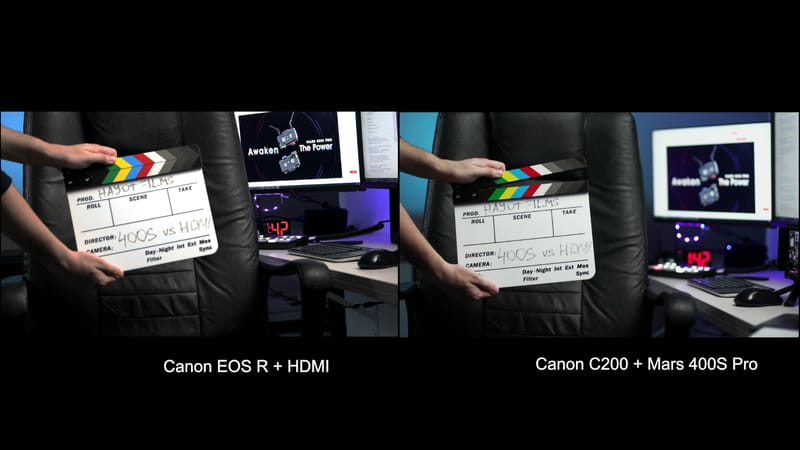
Before I start, I want to mention that in my YouTube video, I’m using four types of microphone setups to check the quality and compare Hollyland Lark 150 with other brands like Tascam and Sennheiser.
I will be using these setups and switching from one to another during my video, so I would recommend watching that video above.
First simple trick: Better lavalier mic for your wireless lavalier microphone system.
I watched many wireless lavalier microphone system reviews and most use Lark 150’s default lavalier microphone to compare with other brands. For example, I watched many comparison videos like Lark 150 vs. Rode wireless go.
As you know, Rode wireless go doesn’t include a lavalier mic in the box, so you have to buy it separately.
So why not do the same with the Lark 150?
I would suggest using more professional lavalier mics from Rode or Sennheiser with Hollyland Lark 150, which can significantly improve your system’s sound quality compared to the default lav mic that comes in the box.
As you can hear from my test in the video above, when I switch from default lavalier mic to more quality Rode lav mic within the same system like Lark 150, quality gets improved.
Second simple trick: Live Stream use cases with Atem mini Pro
If you watched my previous videos, where I talk about our live stream setups, you already know we use different wireless audio systems.
Just in case you want to learn more about our multi-camera live stream setups, I would recommend watching my YouTube video below:
When we do multi-camera live streaming, we always connect one camera using SDI or HDMI cable and the second camera using a wireless video transmission system like Hollyland Mars 400s Pro.
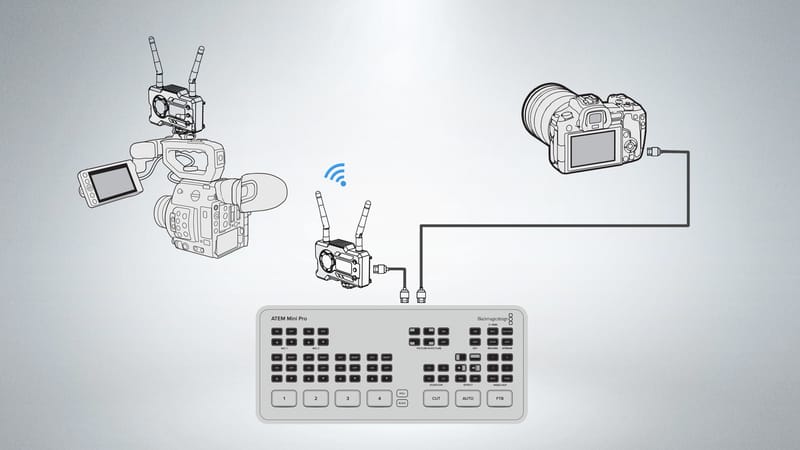
If you have this setup, you already know that you will get 3-4 frames of audio delay when you switch cameras during the live stream. That’s because I always recommend connecting a wireless audio receiver straight to your live stream switcher; in our case, it’s Atem Mini Pro.
This will give you an option to correct the audio delay in Atem software and sync audio perfectly for both camera streams.
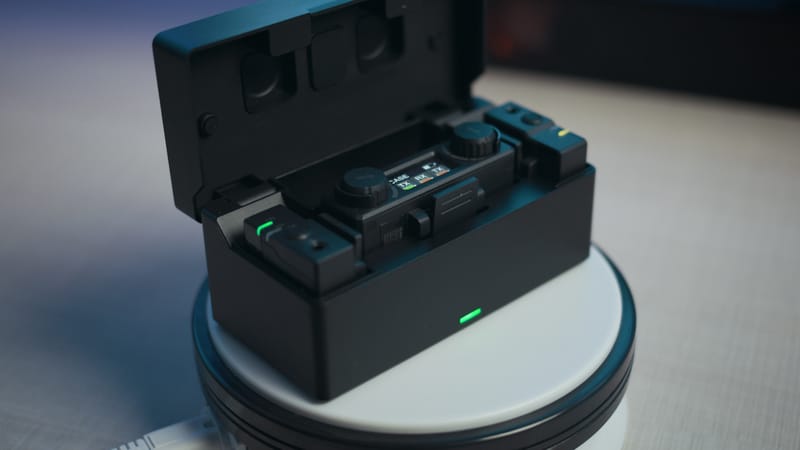
I love using Hollyland Mark 150 for our live stream setups. It is not only because it has two transmitters and one receiver, which I think is awesome.
The receiver also has a manual audio level correction and what’s most important, it has a headphone jack. If you ever used Atem Mini Pro, then you know you don’t have any headphone jack input in the actual unit.
I know you can use HDMI output to connect to your preview monitor, and after that, you can use a headphone jack input of your monitor, if it has one.
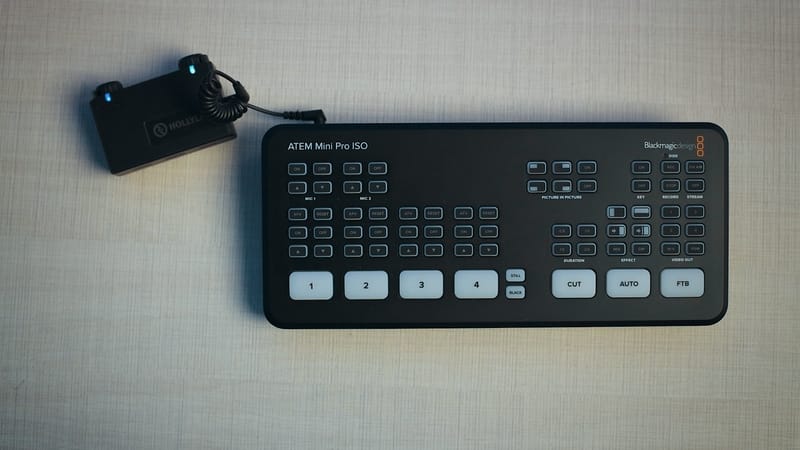
But using Hollyland Lark 150 receiver’s headphone jack makes life much easier.
You can also use two units of Hollyland Lark 150 to wire up four people using split-mono instead of stereo and correct audio delay for each unit separately. Usually, you can get only two audio streams except for camera audio if you don’t use audio recorders like Zoom H5 because Atem Mini Pro has only two stereo mini-jack inputs.
Third simple trick: Wireless sound recording of conferences, events and weddings
Sometimes filming a conference, event or wedding can be tricky, but one of the most important things in these shootings is sound recording. If you shoot any long event, you already know how important it is to get clean audio from a DJ’s board or sound technician.
Typically, videographers connect a recorder like Zoom H5 or H6 to the sound technician’s board to record clean audio. During the event, they have to go there and check the sound if it’s recording properly.
It’s time-consuming, and also sometimes, a DJ can forget that we’re recording and change the output volume or, worse cases, unplug the recorder accidentally.
In our production, we always use wireless audio systems to check the sound in the distance and record the clean audio straight to our cameras. For this, Hollyland Lark 150 can be convenient.
Here is how everything works:
We connect our Zoom H5 to a DJ’s board and using the recorder’s line out, we connect the cable to one of the Hollyland Lark 150’s transmitters. After we just connect the receiver to one of our main cameras.

Here is what we will get with this simple trick:
- We can monitor the audio level without checking our Zoom H5.
- We get clean audio to our camera, so you don’t have to do audio sync in post.
- Just in case we also get Zoom H5 backup recording, if we experience any signal interference or dropouts, we can use the clean audio from our Zoom recorder.
- If something happens to our Zoom H5, like the battery dies, the DJ unplugs our recorder or changes the volume output, we will know that immediately, so we can fix it.
This is a handy, simple trick that can save a lot of headaches and simplify our job while shooting any event.
We also recommend reading our newest similar blog post “Two Camera Corporate Interview Setup: Our Cameras and Lighting Setup”
Fourth simple trick: Safety track
My next trick is about safety track. What I love about the Hollyland Lark 150 is using the right channel as -6 db safety track.

That means if your interviewer suddenly speaks louder and you couldn’t have time to change the level on a set, you can use the right channel on your post-production to fix that.
But be aware that your transmitter’s audio will be mixed to the left channel, which means that if you use your backup right channel, you can’t adjust the volume of your transmitters separately.
This means if your first interviewer speaks louder and the second one quieter simultaneously or you want to mute the second speaker’s audio in post, then making these changes can be almost impossible.
In these situations, I would recommend using an audio recorder instead of your camera. Most recorders or professional cameras have the option to record safety tracks to other channels.
For example, I have a Canon C200, which has built-in safety track recording. For that, I just need to connect the receiver to my mic input. If you don’t have this function in your camera, you can always use audio recorders like Zoom H5 or Zoom H6.
After I just set Lark 150 to stereo mode, where each transmitter has its own channel. So, my first transmitter’s audio is going from the right channel and the second one from the left.
With this simple trick, you get each audio separately, and also, as a backup, you will have a safety track for each channel independently. It gives you so much flexibility in your post-production.
Fifth simple trick: Positioning the transmitter on your talent the right way
Positioning the wireless lavalier microphone on your talent is very important. If you do long distance filming when your interviewer is far away from your camera, you can sometimes experience audio dropouts. It often happens, especially at weddings.
We also recommend reading our newest blog post “Hollyland Solidcom C1 is the Best Wireless Intercom for Filmmakers? | In-depth Review”
In these cases, I would always recommend putting the transmitter facing your camera. I know it can be complicated because sometimes talents, or let’s say a groom, can turn around and block the signal with his own body.
For these situations, I would recommend using a lavalier mic with your Lark 150 transmitter and position the transmitter on the side of the person you are wiring up, depending on your camera position.
So, if the person turns around during the shooting, the transmitter will still be visible and that person won’t block the signal. This simple trick can reduce the audio dropouts to a minimum and get clean audio with no problems.
These were five simple tricks we use in our video production and these tricks rescued us many times. I hope it was useful for you as well, and you learned how to get the most out of your Hollyland Lark 150.